Getting started
Download teacups
You can download teacups via git:
git clone 'https://github.com/TheresiaQuintes/teacups.git'
Installation
Note
Anaconda is used for development and so it is highly recommended. Virtualenv might be possible, but there is no guarantee for full functionality!
Open a Conda-Shell
Setup a new conda environment:
conda create -n teacups python=3.12
Note
You can also use another environment name or use an existing environment. It is recommended to use a new environment to avoid side effects.
Activate the conda environment:
conda activate teacups
Install from your cloned directory:
pip install .
Or install via pip:
pip install teacups
Test your installation
Run the following script in an IDE (e.g. Thonny, Spyder…) of your choice:
import teacups.classes as cl
import teacups.simulations as sim
import matplotlib.pyplot as plt
Sys = cl.Sys()
Exp = cl.Exp()
SimOpt = cl.SimOpt()
spec = sim.teacups(Sys, Exp, SimOpt)
plt.figure()
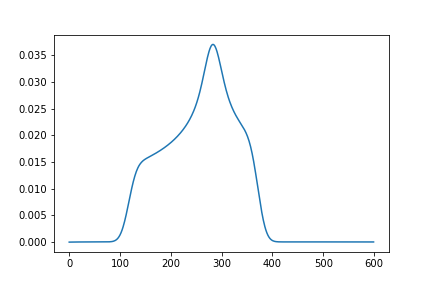
plt.plot(spec[5].real)
plt.figure()
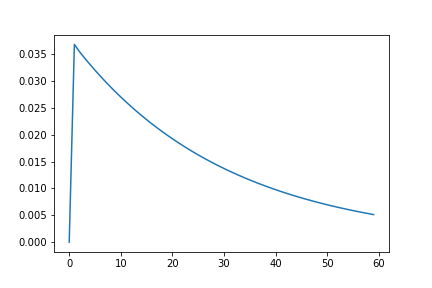
plt.plot(spec[:, 300].real)
On Windows you have to run the following Skript:
import teacups.classes as cl
import teacups.simulations as sim
import matplotlib.pyplot as plt

if __name__ == "__main__":
    Sys = cl.Sys()
    Exp = cl.Exp()
    SimOpt = cl.SimOpt()

    spec = sim.teacups(Sys, Exp, SimOpt)

    plt.figure()
    plt.plot(spec[5].real)
    plt.figure()
    plt.plot(spec[:, 300].real)
    plt.show()
You should receive the following two images:
Attention
On Windows you have to enclose your code always into the statement if __name__ == "__main__:" to ensure that the multiprocessing works properly. For the correct syntax see the example above.